Azure DevOps Repository Management

This post will explain how to manage a GIT repository with Azure DevOps. How to properly manage branches, commits, pull requests (PRs), code reviews and much more.
Getting Started
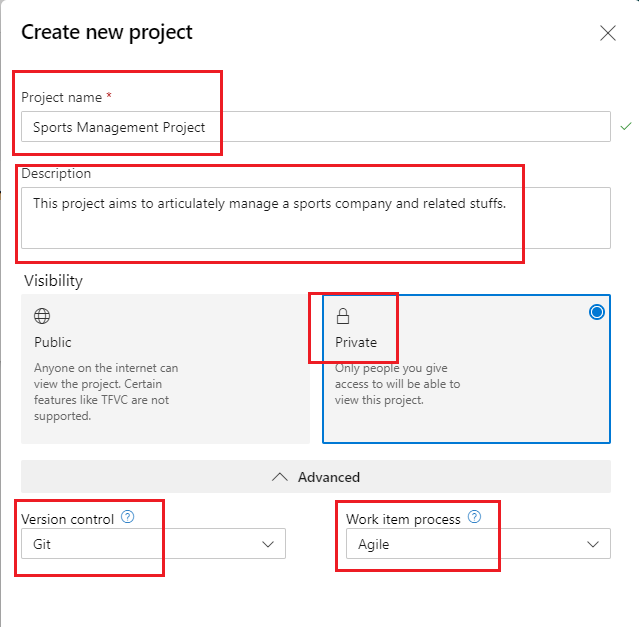
Login to your Azure DevOps account at https://dev.azure.com/ and create a new project, if not yet created.
Let’s have a valid project name, a related description, private visibility, Git as version control and Agile as process.
The dashboard of the newly created project should look something like below. We would be looking at the Azure Repos section.
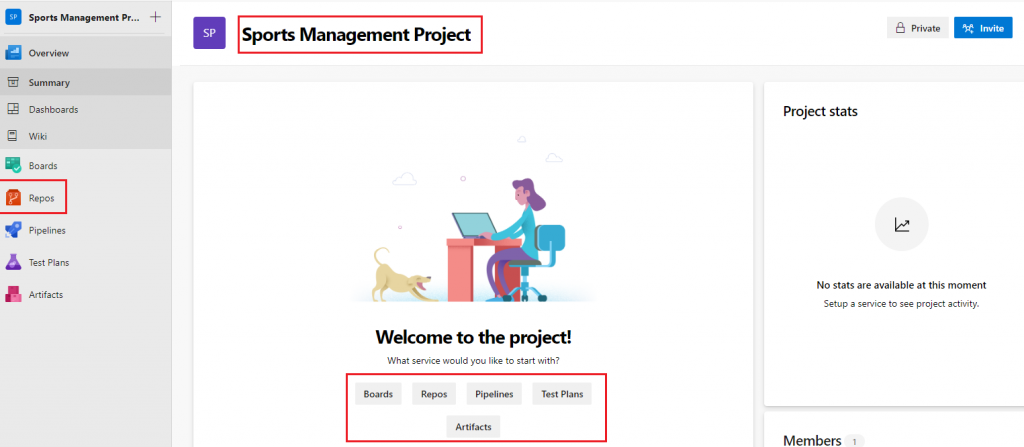
Click on Azure Repos, we see an empty repository, name of which is same as the project created i.e. ‘Sports Management Project‘.
Since the repository is empty, we have 3 options as listed below:
- Clone the empty repo.
- Push an existing repo using command line.
- Import a repository.
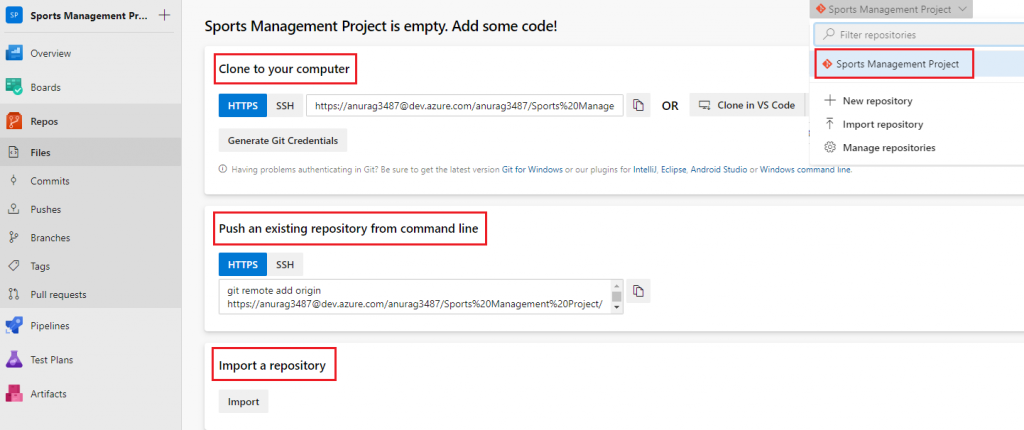
Let’s start to explore the above 3 options, prior to that let’s add a ReadMe.md file to summarize the project.
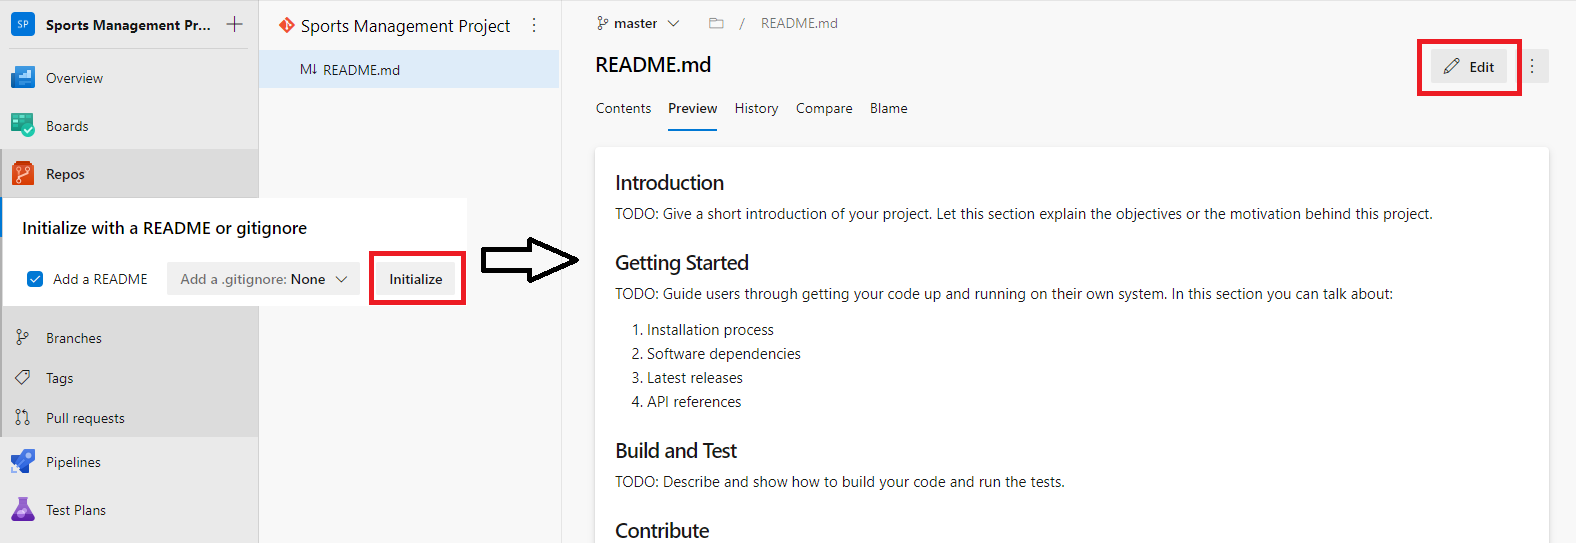
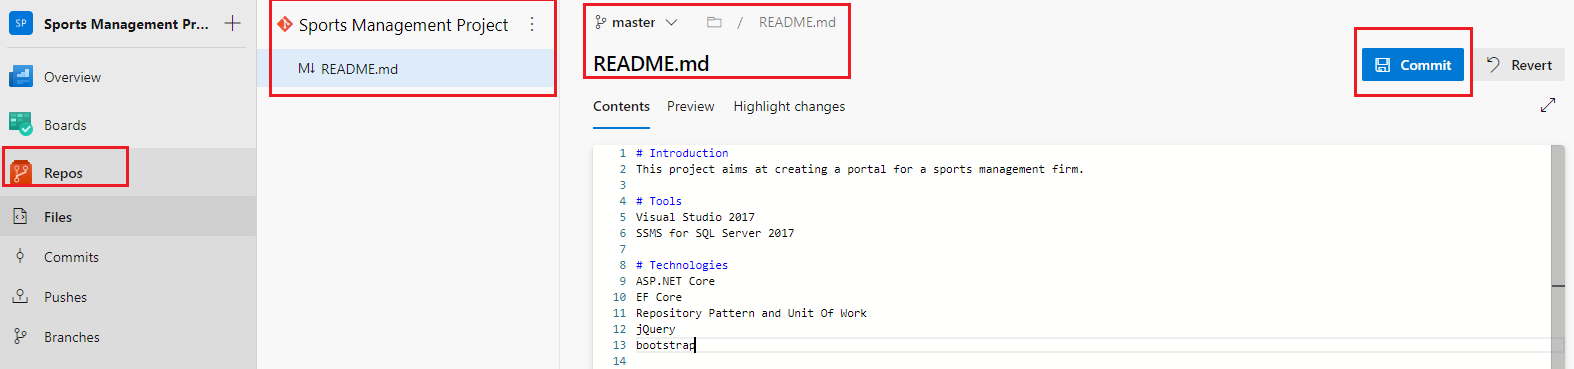
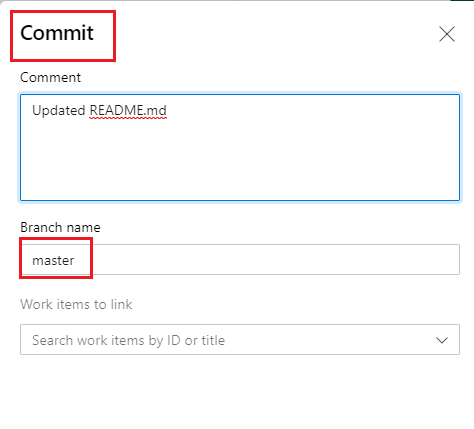

As soon as a ReadMe.md file is initialized and created, a master branch gets created. The above edit and commit happened in this very branch.
Clone the repo to Visual Studio
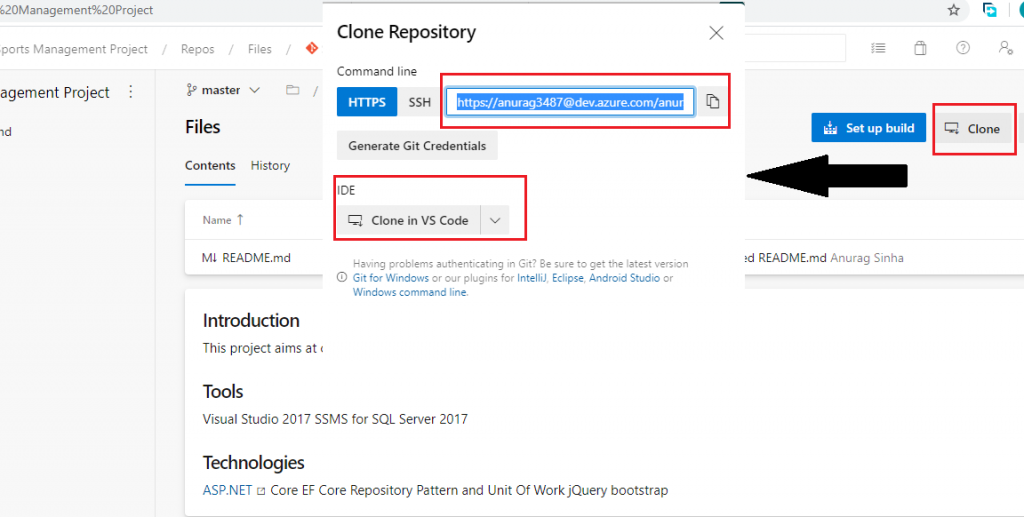
Let us try to clone the project in Visual Studio because we would create this project on .NET stack.
Click on Repos->Files -> Clone button as shown in below screenshot.
It will open a dialog box which will have the clone URL.
Alternatively we can choose our IDE from the drop down, and the repo will be cloned in the respective IDE.
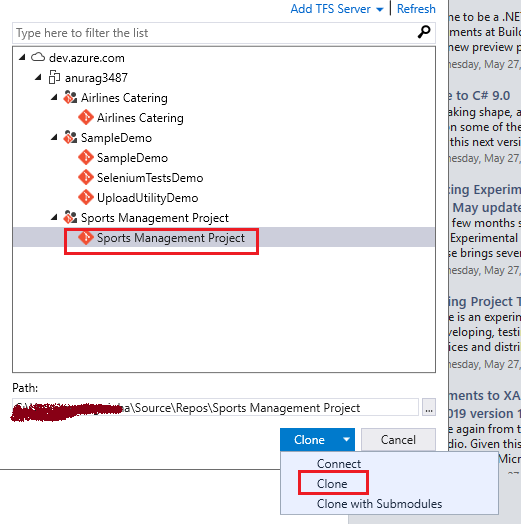
We will open Visual Studio 2017. Click on Team Explorer -> Manage Connections -> Connect to a Project.
VS will ask for DevOps credentials if we haven’t connected to Azure DevOps earlier. Provide your correct credentials and the connection would be successful.
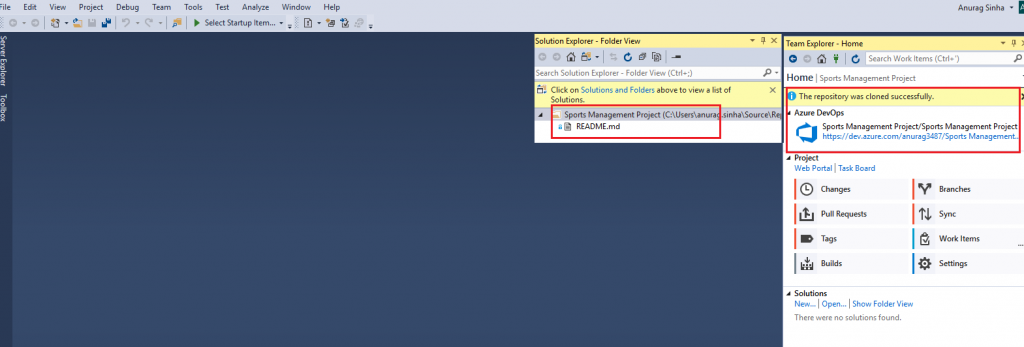
Click on the Sports Management Project Repository and clone it, as shown below:

Successful clone of the repo will display a success message in the Team Explorer as shown below:
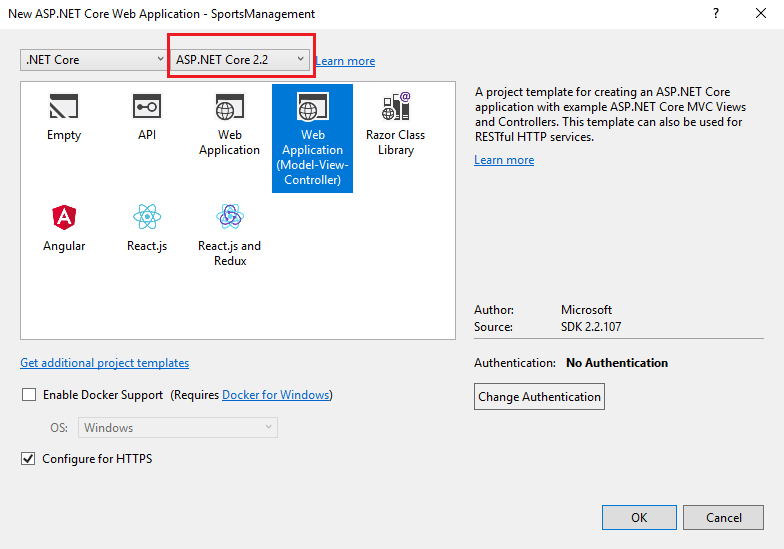
We now will add a new ASP.NET Core Web Application project to the repo.
Click on Team Explorer -> Solutions -> New -> Select ASP.NET Core Web Application template -> provide proper project/solution name -> Select MVC template -> Create.

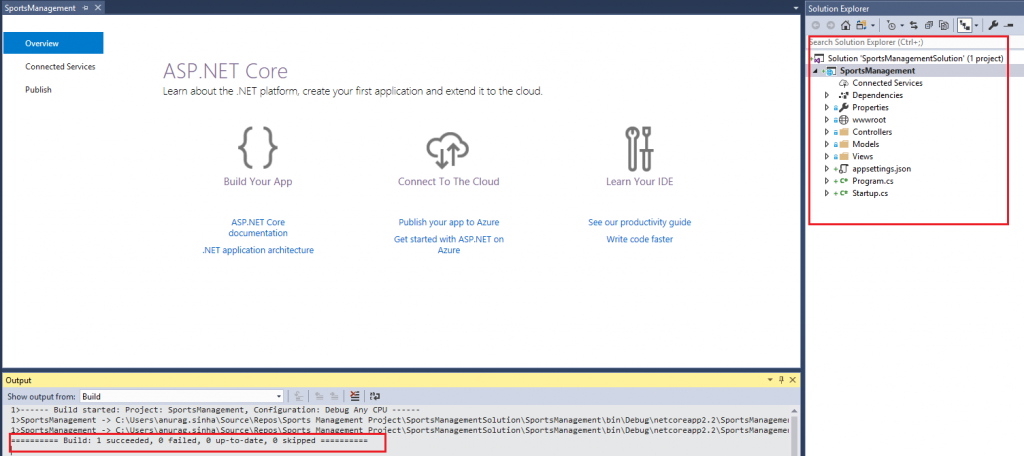
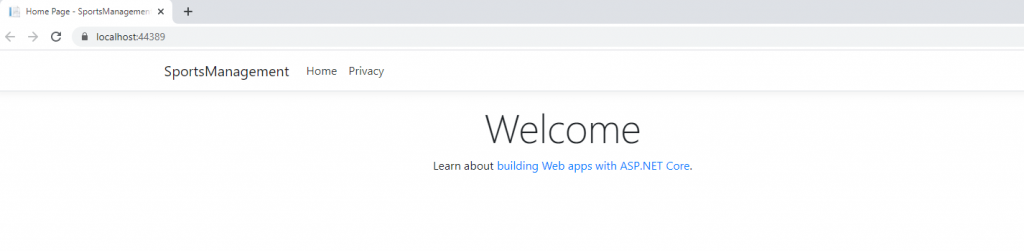
The solution and project would be created, build the solution to check for any errors or dependency issues. Start the project to double check.
Commit code to Azure DevOps from Visual Studio
We would see how to check in and commit code directly from Visual Studio to Azure DevOps.
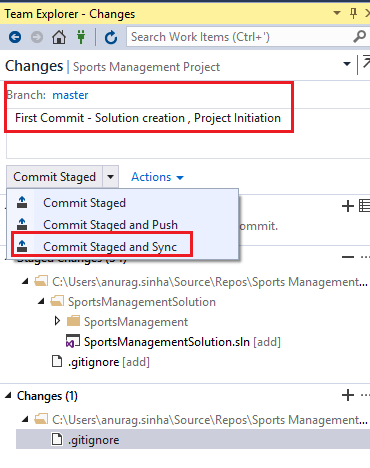
Browse to Team Explorer -> Changes.
Stage the required changes, add irrelevant changes to gitignore.
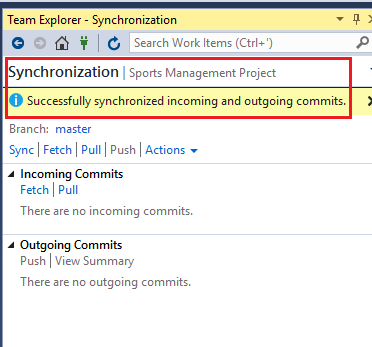
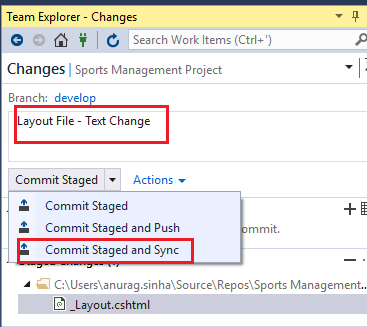
Enter a valid related comment and click on Commit Staged and Sync. This option will commit and push the changes from local master branch to remote master branch.
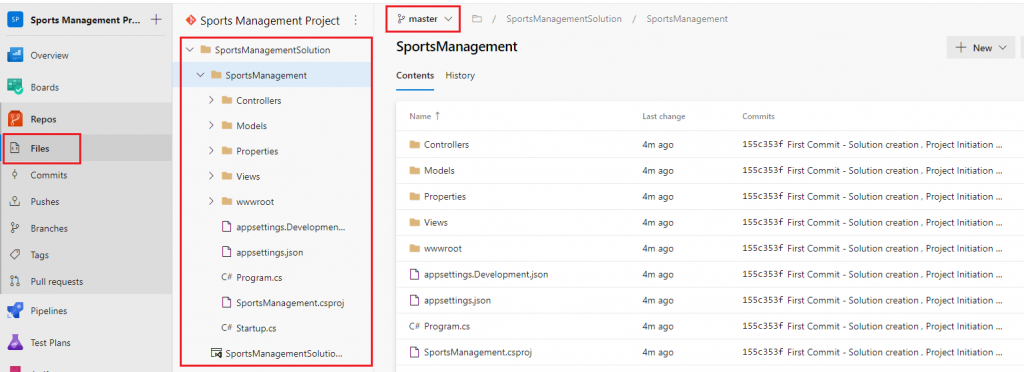
Let’s have a look to the Azure DevOps project and see what happened to the Azure Repos. Click on Azure Repos -> Commits. We would find our latest commit over there and the relevant files will be available under the Files section.

You might be wondering as to why everything is happening in master branch. Well that’s because master is the only branch available currently.
Branches in Azure Repos
We will carve out branches from master, and see how merge, Pull Requests happen.
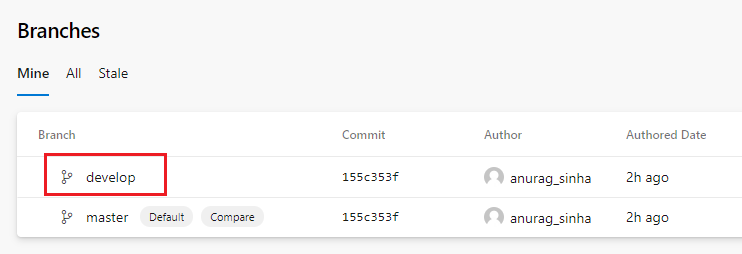
Click on Azure Repos ->Branches -> New Branch, as shown below.

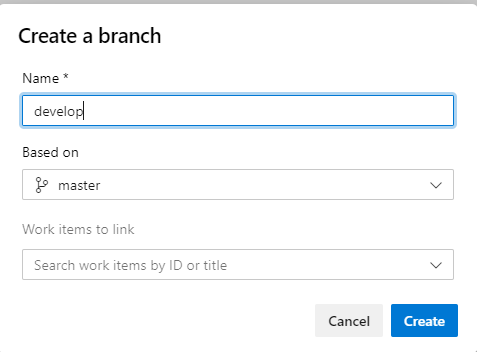
Click on Create and the branch will be created.
Let us checkout develop branch in Visual Studio, do some code changes, commit the code to develop branch, and then raise a Pull Request for the code to be merged in master.
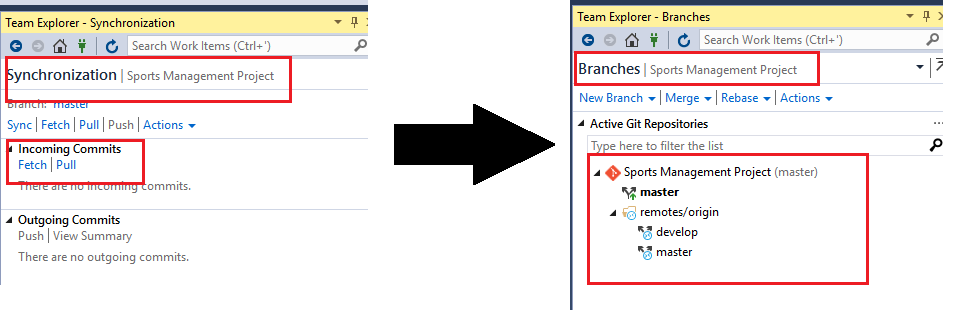
Browse to Visual Studio -> Team Explorer -> Branches.
We don’t see develop branch yet.

Go to Team Explorer -> Sync -> Perform a fetch operation to get all the latest stuffs from the remote. Once sync is done, you’ll be able to see develop branch.
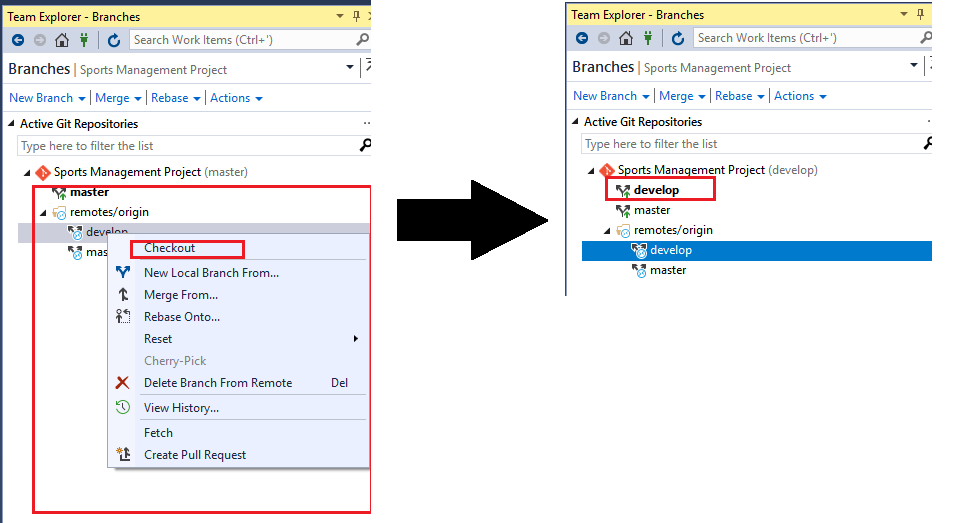
Right click on origin/develop and click on Checkout, develop branch will be checked out in local.
Code Changes
Let’s perform few code changes in develop branch at local, commit them in and raise a PR in Azure DevOps to merge in master branch.
I have made a small change in _Layout.cshtml file, and will commit it in develop branch.
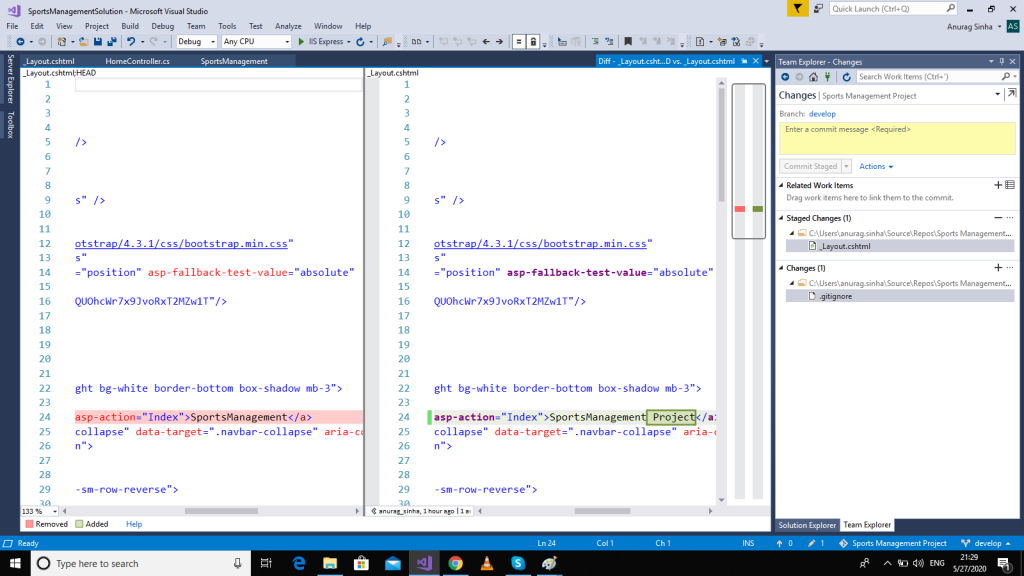
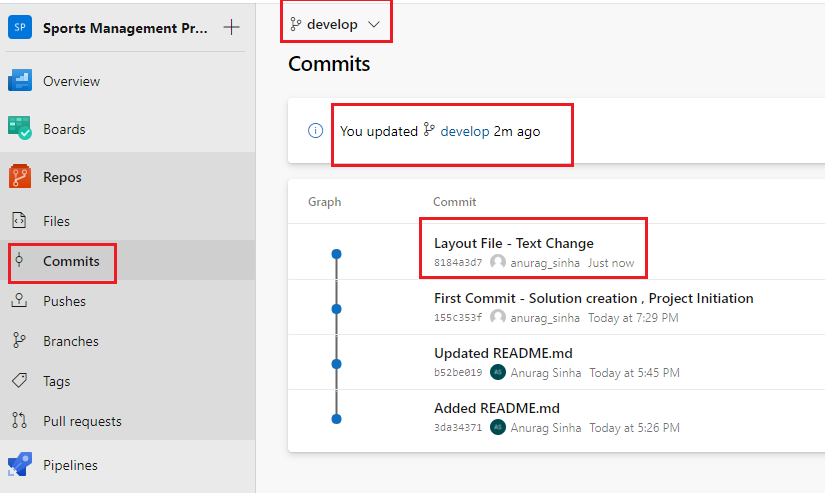
Azure Repos -> Commits -> shows the latest commit to the develop branch.
Create a Pull Request
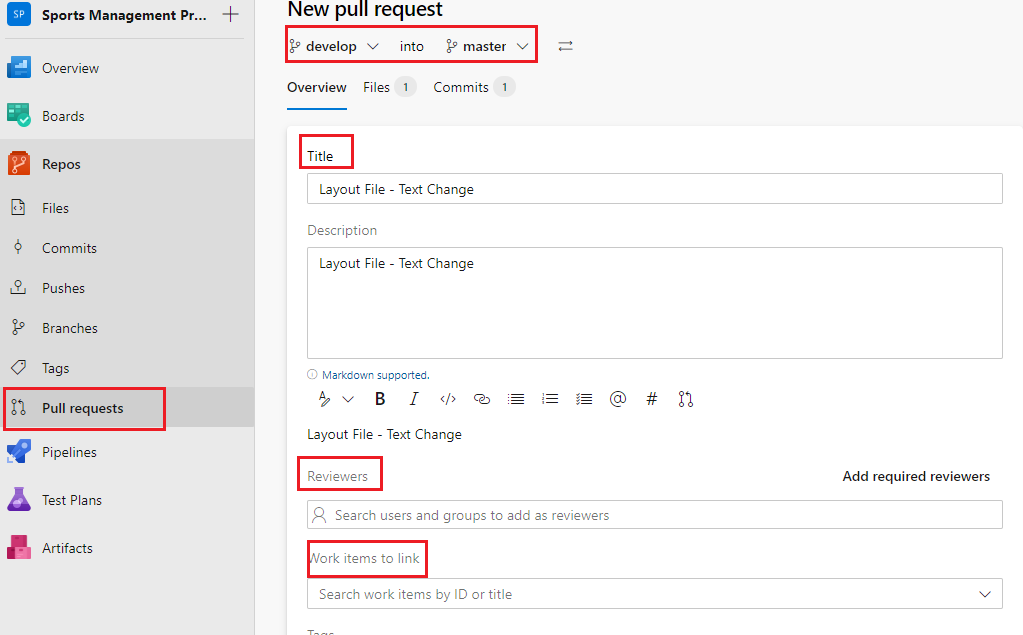
Browse to Pull Requests -> Create a Pull Request
A screen will open specifying the details of the PR, we can add valid title, description, code reviewer details.
PR is directed to master branch, with develop being the source.
Click on Create and a PR will be created as below.
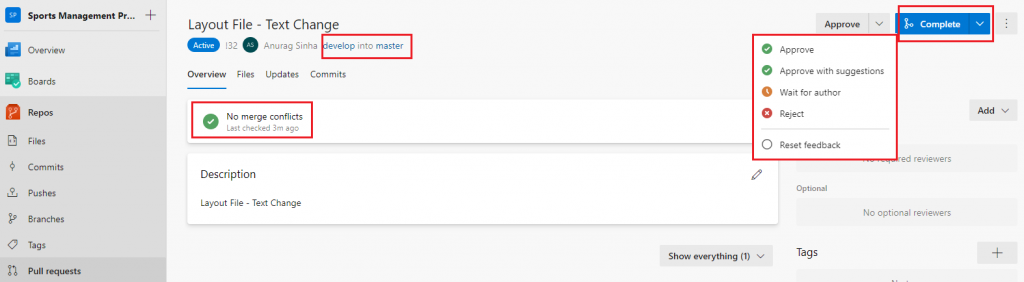
The code reviewer can approve, suggest changes, reject the PR based upon its quality.
We have Overview, Files, Updates, Commits tabs in which further details of the PR can be looked into.
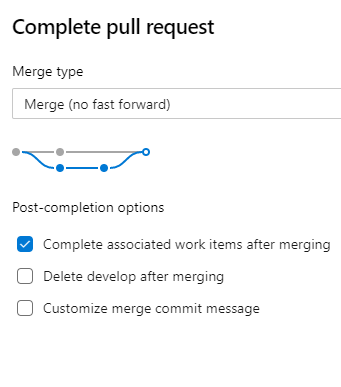
Approve the merge by clicking on Approve -> Complete.
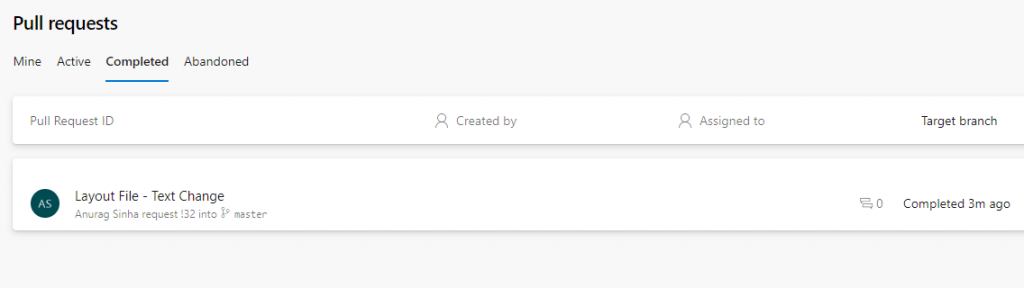
Look out for the list of completed PRs as below.
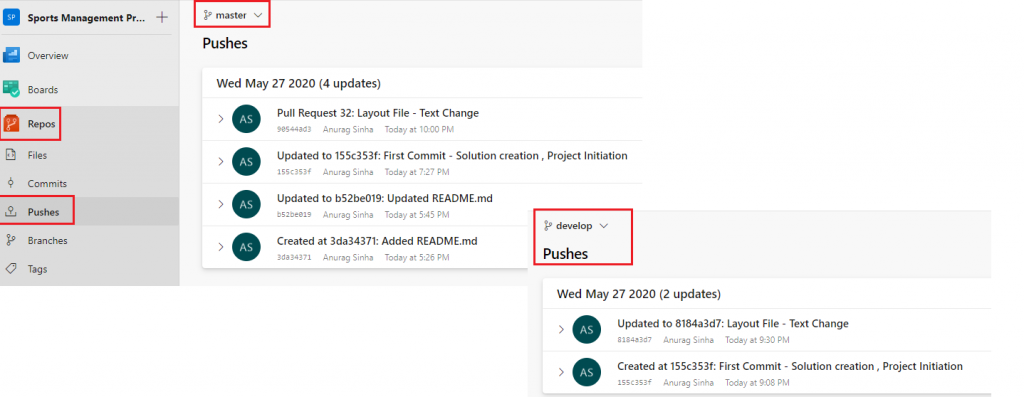
Pushes display what all code pushes have been done to the branches, browse to Azure Repos -> Pushes.
Conclusion
Summary of the above post lies in the below illustration.
Create an Azure DevOps project, connect to the IDE of your choice, certainly not only limited to Visual Studio, interact with Azure Repos.
Various services available are : Files, Commits, Pushes, Branches, Tags and Pull Requests.


