In this post, we would see how to create a CI/CD pipeline in Azure DevOps, and deploy a .NET Core application to Azure App Service along with an Azure SQL database.
Getting Started
We’ll resume on the same ‘Sports Management Project’, which we had created in one of the starting posts on Azure DevOps, http://techncode.xyz/azure-devops-repository-management/
We’ll have a web page that will show a list of sportspersons via interaction with a database table.
The project is uploaded to GitHub, available at https://github.com/anurag1302/sports-management-project
It contains fully functional code and the database scripts as well.
A video of the working application is embedded below.
Creation of an Azure App Service
We need a server to deploy the application, have chosen it to be an Azure App Service.
Azure App Service is an HTTP-based service for hosting web applications, REST APIs, and mobile back ends. You can develop in your favorite language, be it .NET, .NET Core, Java, Ruby, Node.js, PHP, or Python. Applications run and scale with ease on both Windows and Linux-based environments
We have to have a valid Azure Portal account, to create an Azure App Service. Create one at https://portal.azure.com.
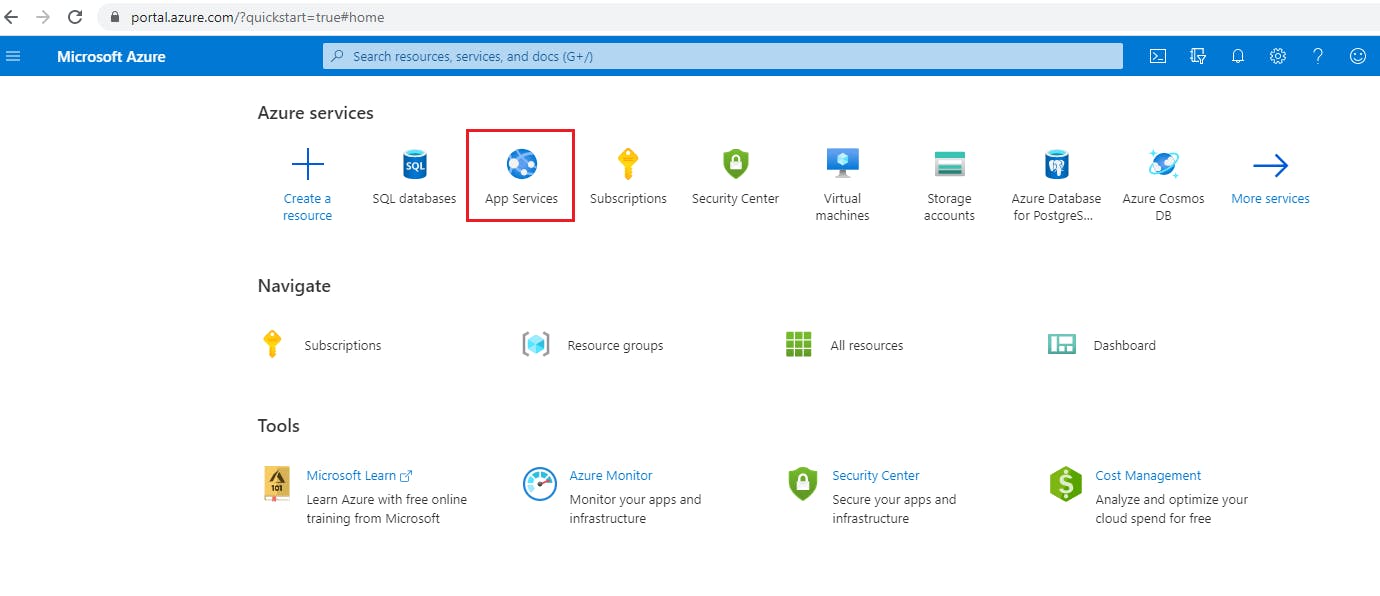
Below is the Azure portal dashboard, click on the App Services icon to create a new one.
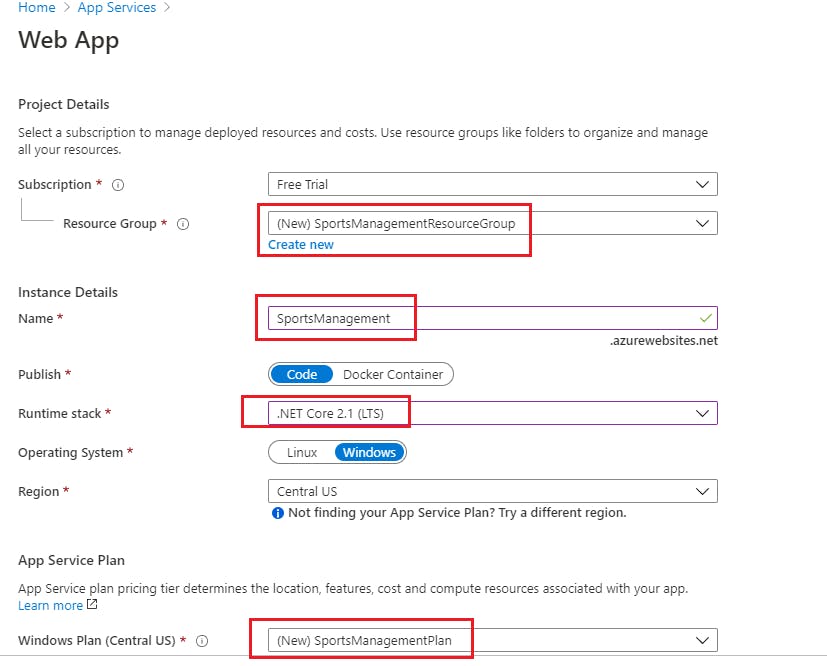
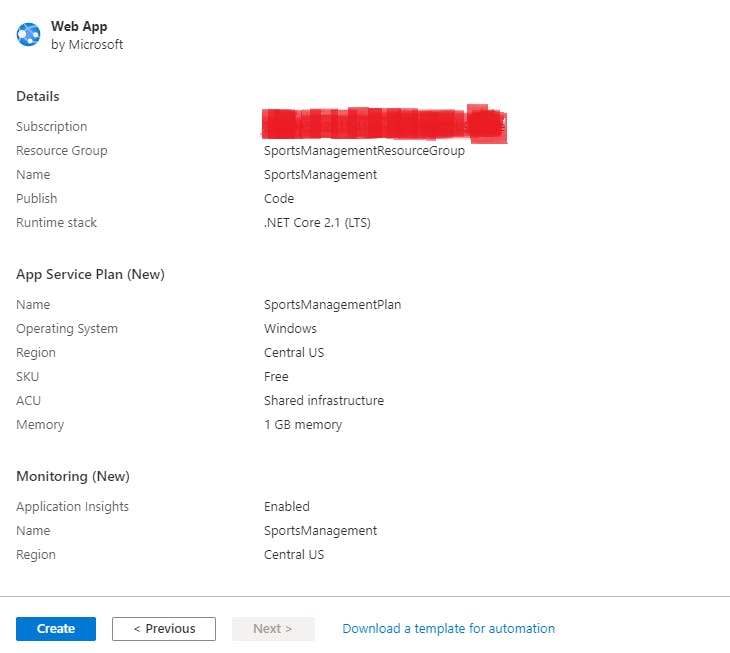
Click on Add and the below screen will open, enter the relevant details, click on Create and you’re good to go.
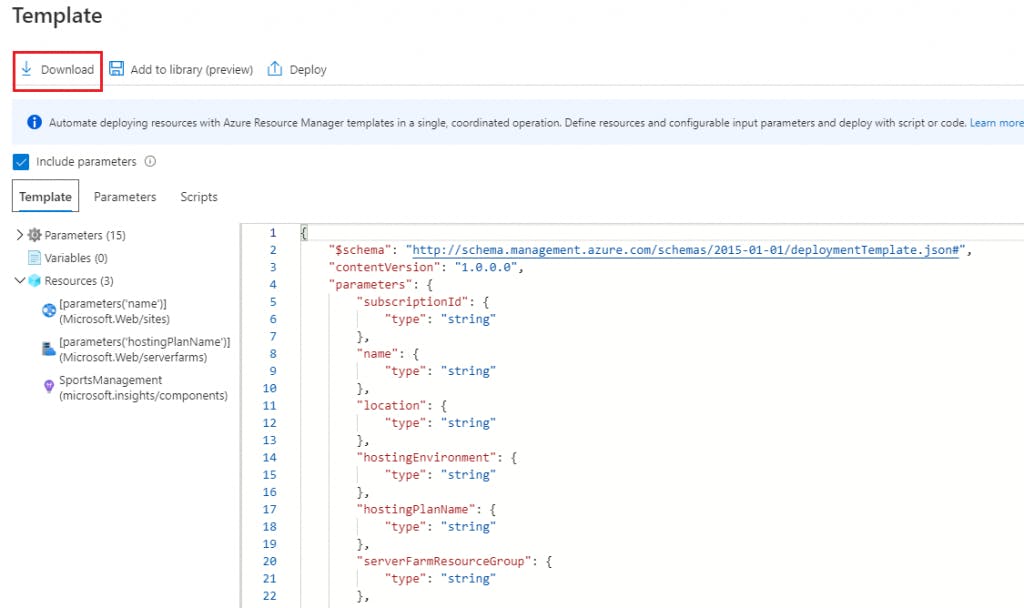
We can automate the above app service creation by using an ARM template. ARM stands for Azure Resource Manager.
To implement infrastructure as code for your Azure solutions, use Azure Resource Manager (ARM) templates. The template is a JavaScript Object Notation (JSON) file that defines the infrastructure and configuration for your project. The template uses declarative syntax, which lets you state what you intend to deploy without having to write the sequence of programming commands to create it. In the template, you specify the resources to deploy and the properties for those resources.
https://docs.microsoft.com/en-us/azure/azure-resource-manager/templates/overview
Browse to your dashboard and the newly created app service will be visible.
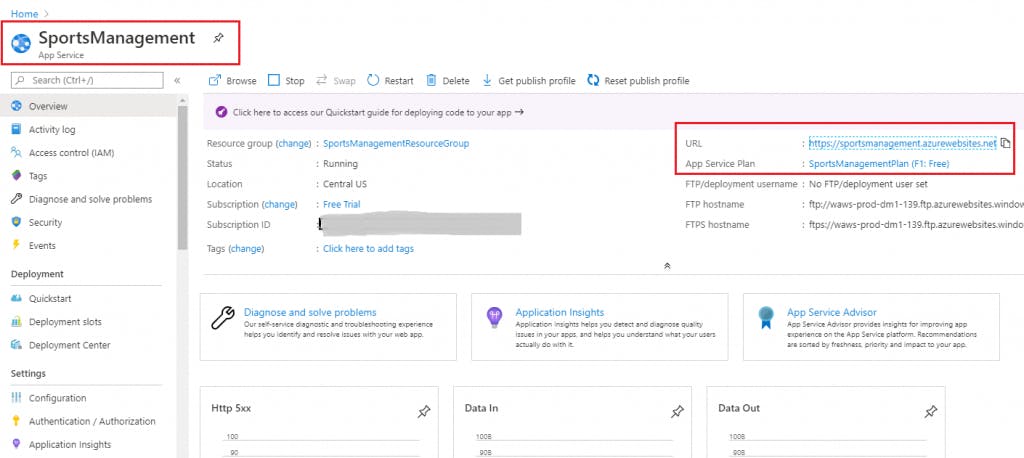
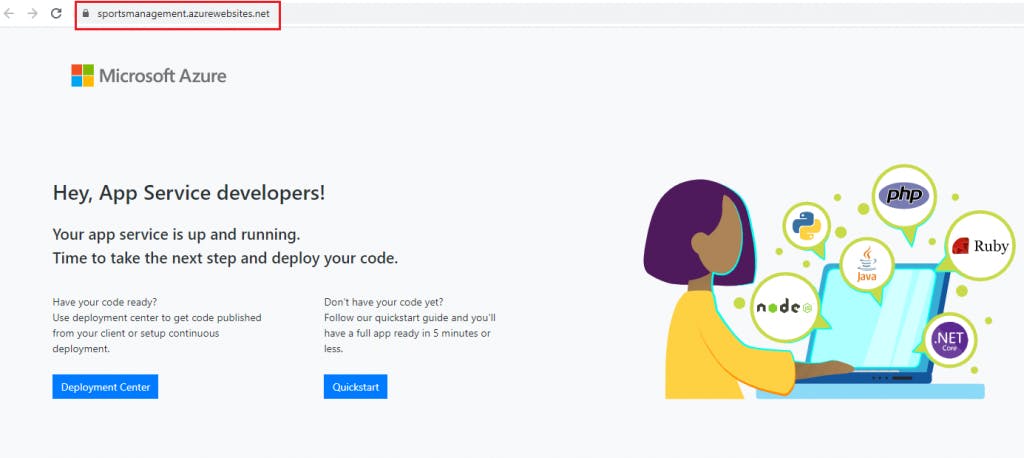
Browse to the website URL here, and we will see a default page.
Creation of an Azure SQL DB
We need a database too for our application as our page interacts with one.
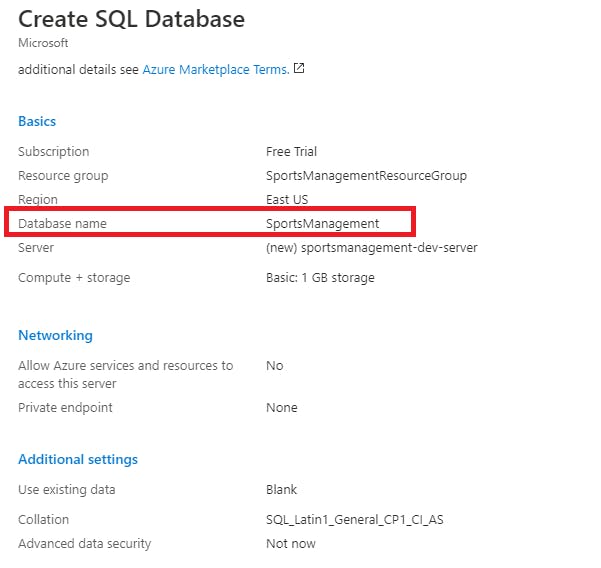
We will create an Azure SQL DB and connect it with the Azure App Service which we have just created.
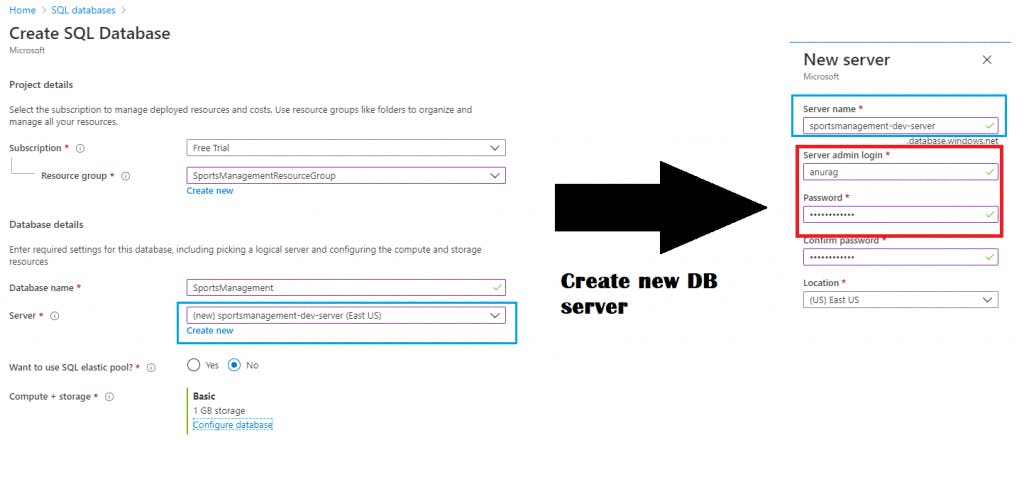
Browse to Azure portal account -> Home -> Sql Databases -> click on Add.
We need to create a DB server (note down the server admin credentials) and associate it with the DB details. The screenshots are in the above image slider.
We need to connect the newly created Azure Sql database to Sql Server Management Studio (SSMS) so that we can execute the scripts. This process can be automated as well, by the use of ARM templates.
Click on Connection Strings in the DB Overview screen shown as below to get the connection details.
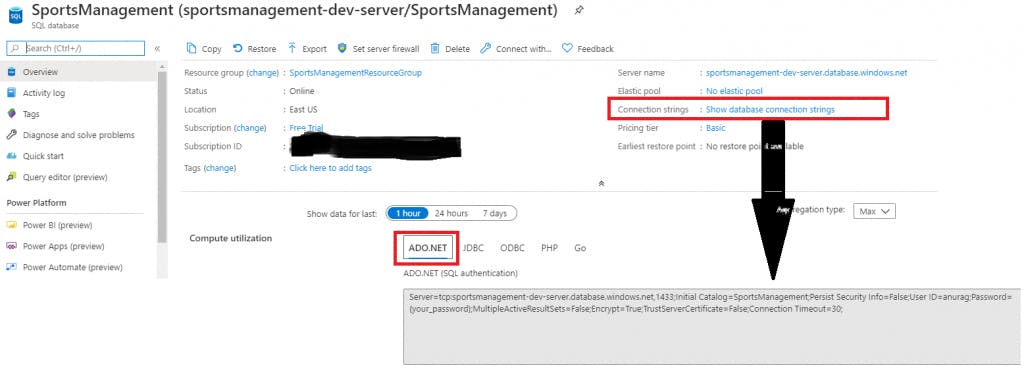
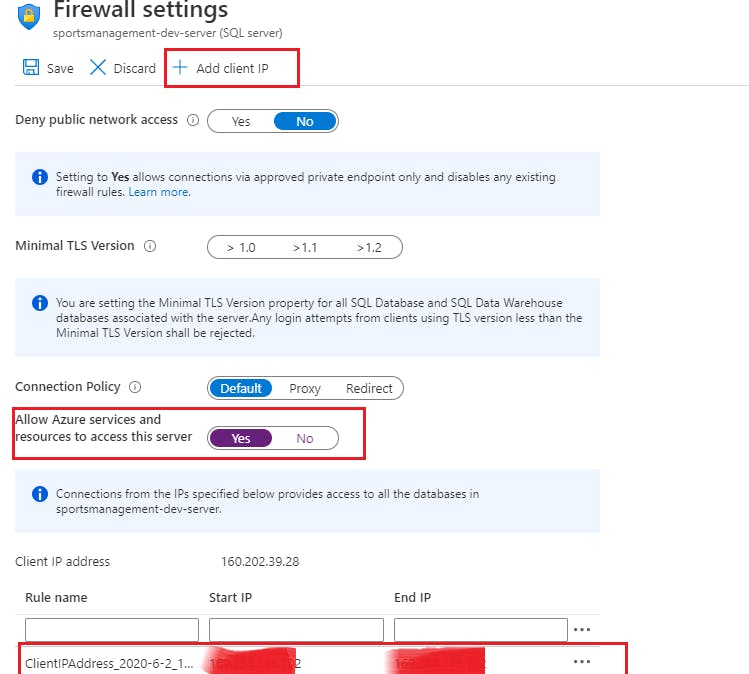
Click on Set Server Firewall and do some settings.
- Add Client IP – add your machine’s IP address so that you’ll be able to connect to the newly created DB server.
- Select Yes on the button which says ‘Allow Azure services and resources to access this server’ – This setting will allow our Azure App service to access the DB server.
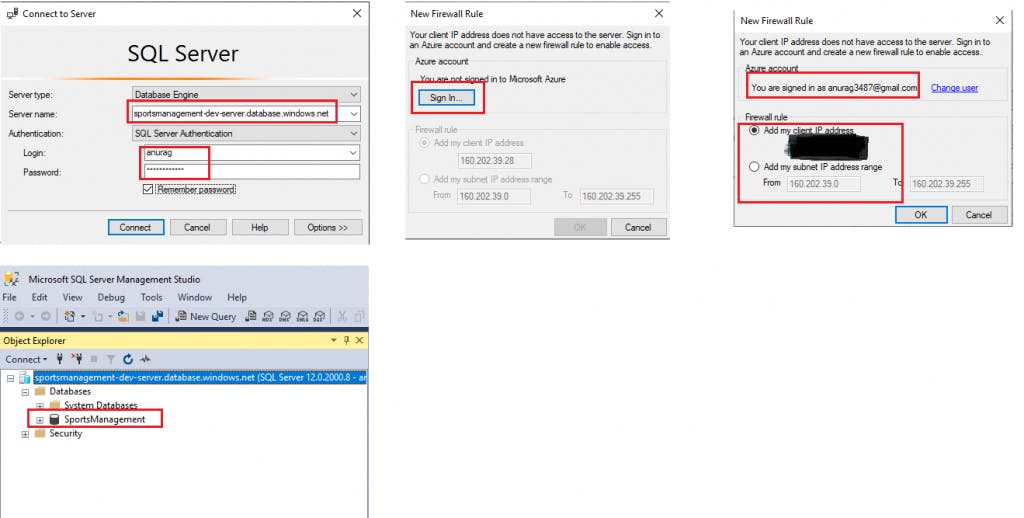
We’ll open SSMS and connect to the Azure SQL DB, namely ‘SportsManagement’. The below details are needed.
- Enter Server Name
- Enter Server Admin credentials
- Authenticate the Azure account
- Add the client IP
The connection will be successful after the above steps and we’ll be able to view the database. Relevant snapshots as below:
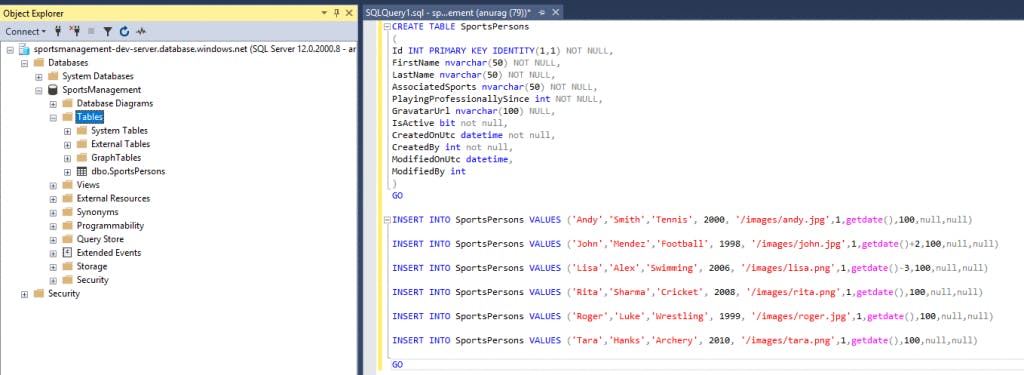
We’ll execute our scripts, shown as below:
Creation of CI/CD pipeline in Azure DevOps
Now that we have completed the creation of the Azure App Service and the Azure SQL DB, its time to create the CI/CD pipeline in Azure DevOps to automatically build and deploy the code.
CI Configuration
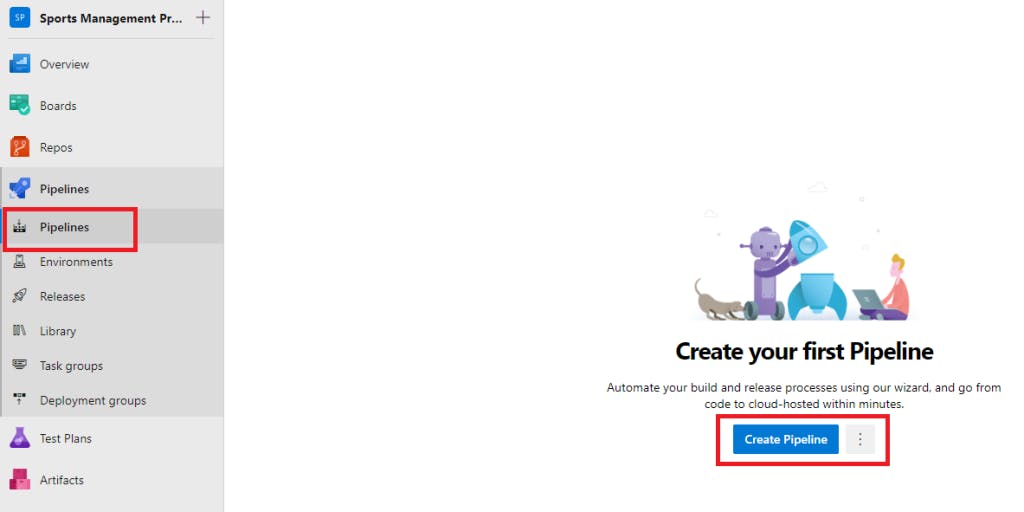
Login to your Azure DevOps account -> browse to Sports Management Project -> Pipelines -> Create Pipeline
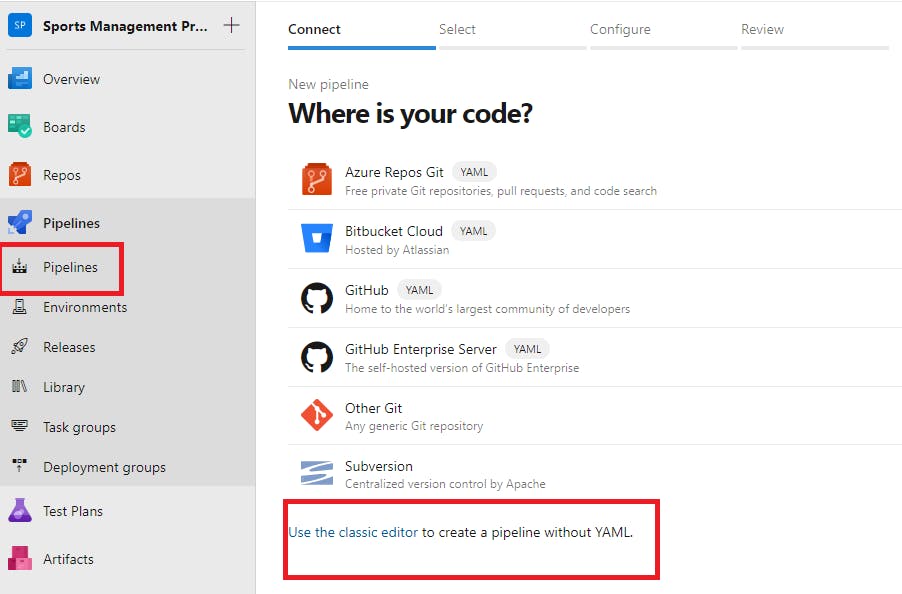
We’ll use the classic editor to customise our CI steps, click on the ‘Use the classic editor’ option, as highlighted below.
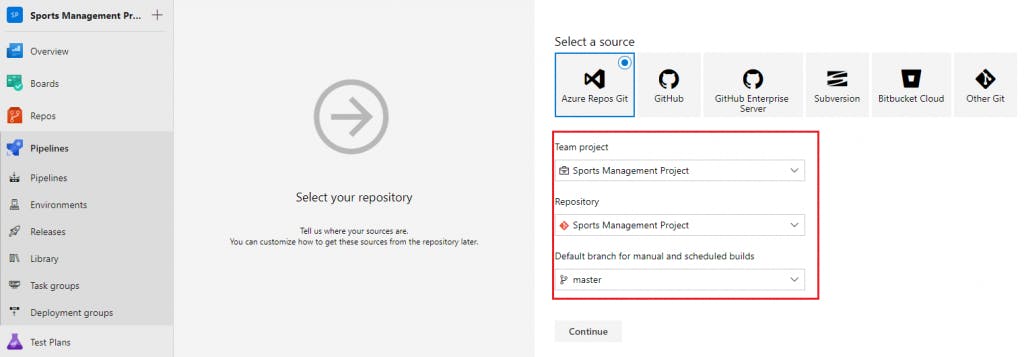
The next screen will ask us where our code’s present, the default selected is Azure Repos, which is our repo as well.
We’ll trigger builds from the ‘master’ branch, and not the ‘develop’ branch.
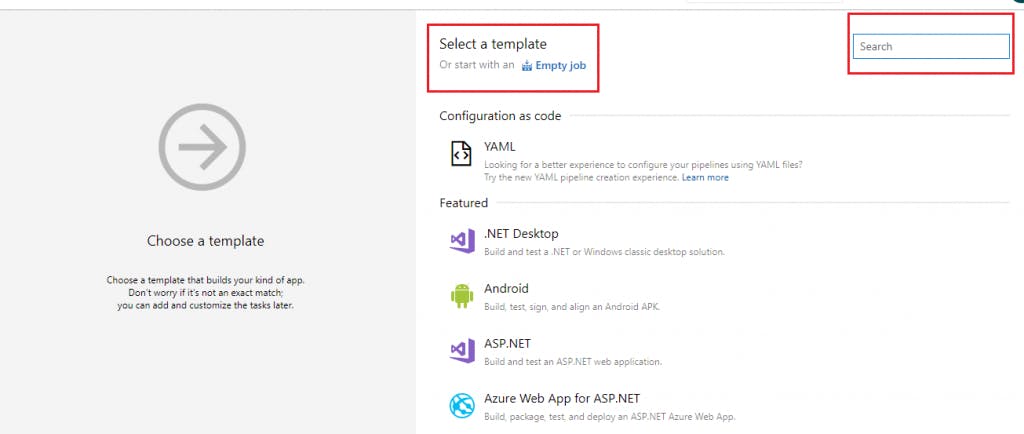
The next screen asks for our preference of the template, i.e., what kind of project do we have. Since ours is an ASP.NET Core app, search for the ASP.NET Core template in the search box provided, and choose the template.
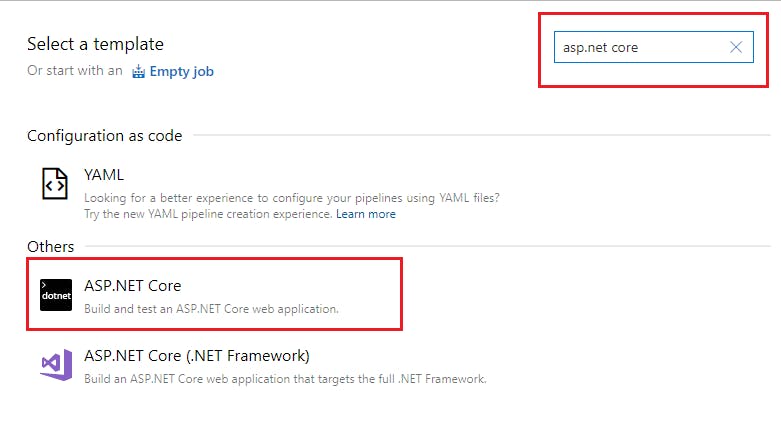
Once we select the template, the next screen has a list of steps, which we need to configure.
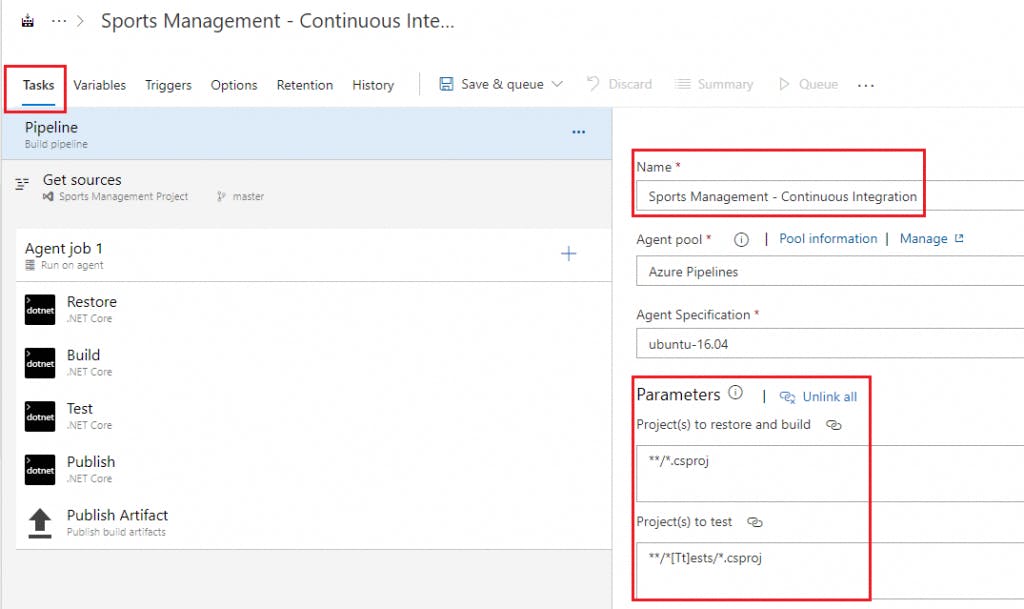
Tasks -> Name of the pipeline, I have given a very simple name, simpler the better.
Agent Pool -> Azure Pipelines (default)
Agent Specification -> ubuntu-16.04 (default)
Parameters -> Projects to restore & build – all the .csproj ones
Projects to test -> projects containing Tests/tests in the name (can be modified as per the Test project name).
I don’t have a Test project in my solution currently.
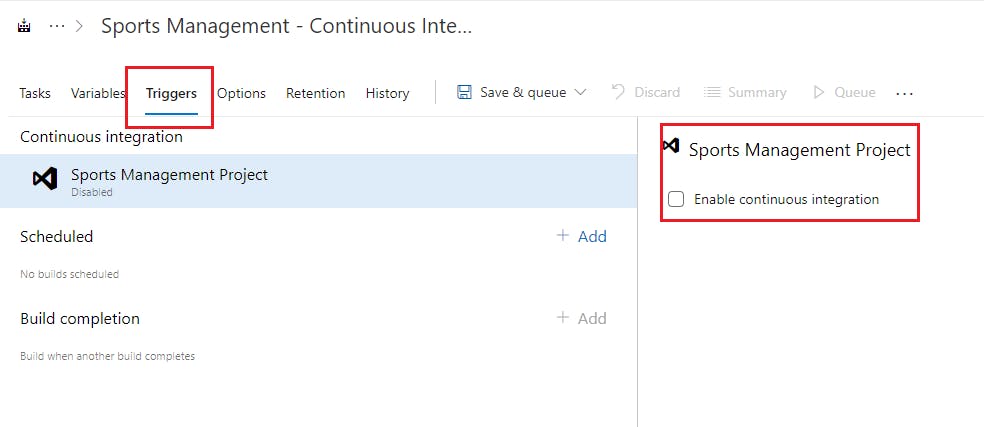
Variables Tab -> click Enable Continuous Integration checkbox (Important)
Agent Job logically groups various tasks under itself, by default the tasks are:
- Restore
- Build
- Test
- Publish
- Publish Artifacts
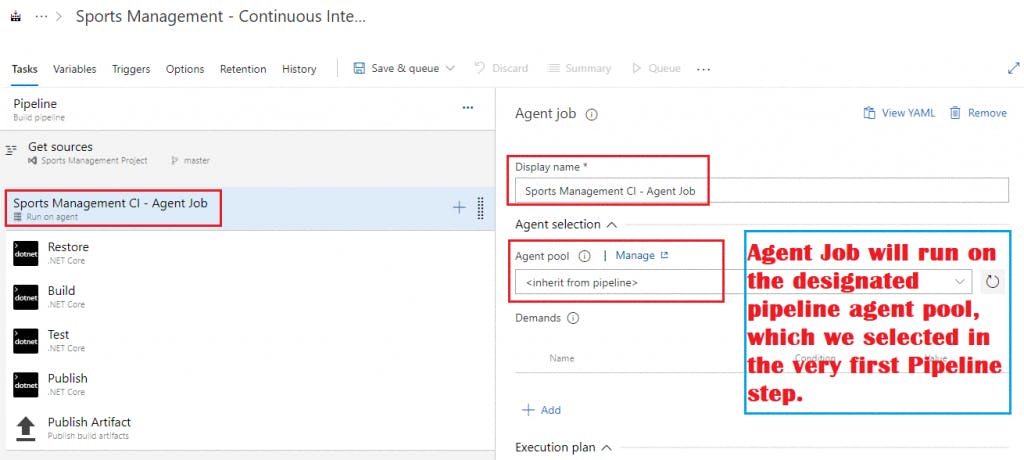
Configure the above 5 steps as needed, in most of the cases default configuration will work pretty fine.
A detailed video of the CI configuration is embedded below.
CI Configuration
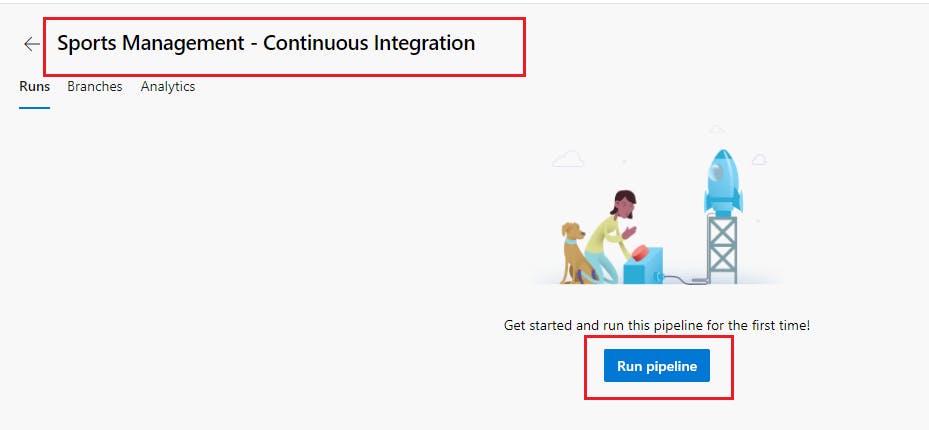
Let’s run the CI pipeline manually to check for any issues.
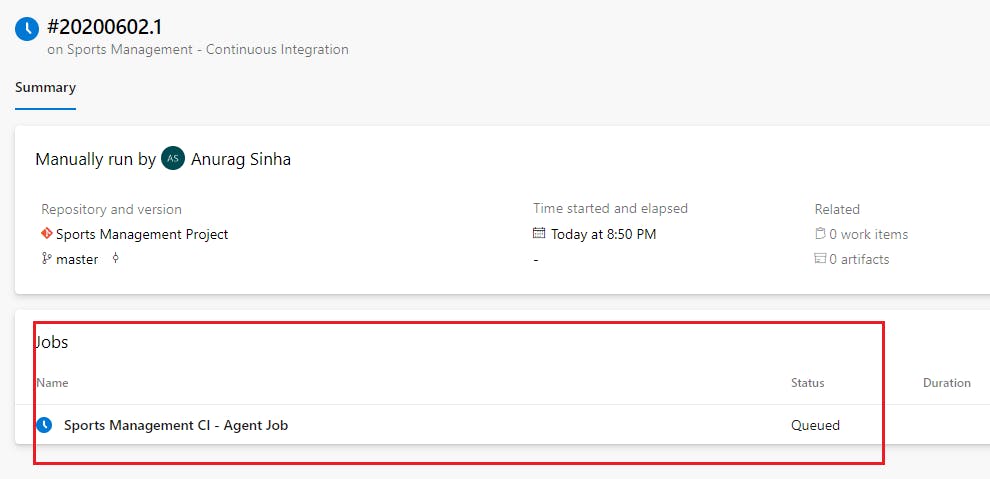
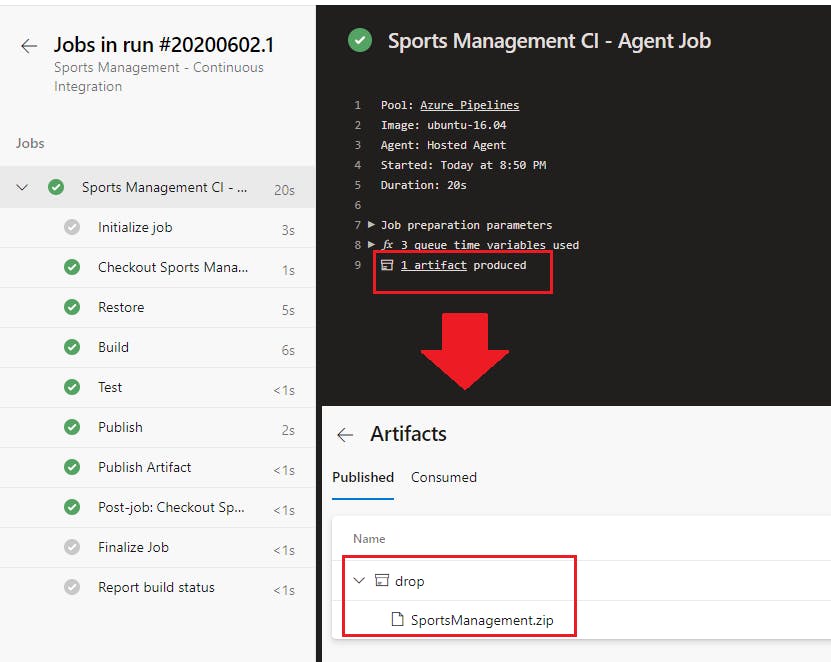
The Continuous Integration step executed successfully, without any errors and the build was published at the drop location, specified in the Published Artifact step as above.
CD Configuration
Click on Pipelines -> Releases -> New

Next screen asks us to select a template, i.e. where we want to deploy our code, since we have an Azure App service configured, we will select the relevant template as shown below.
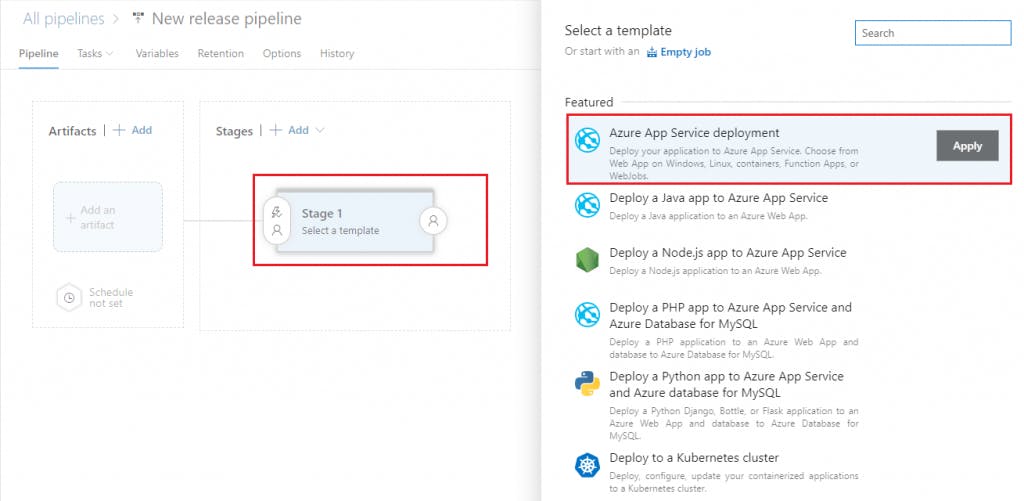
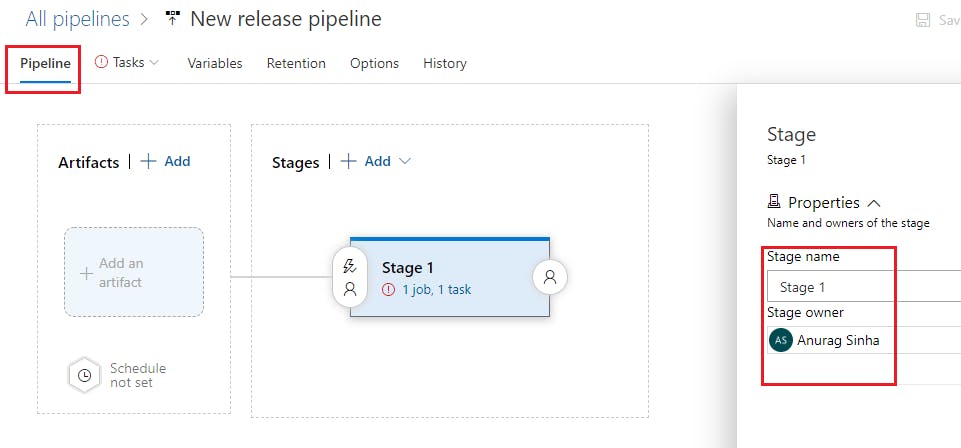
Set the stage name in the Pipeline tab as shown below.
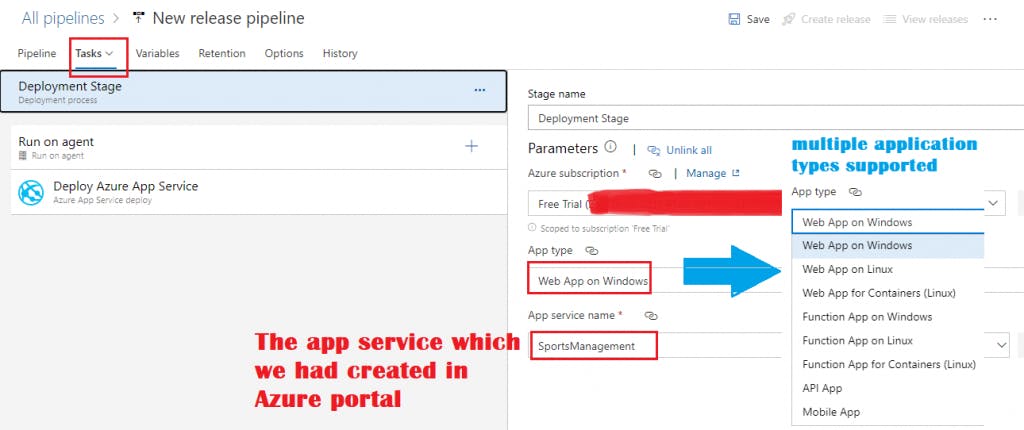
Provide your Azure subscription in the Tasks tab to let Devops know that we are targeting Azure. Also, the proper App Service name needs to be selected from the drop-down list. The screenshot is as below.
Save the stage.
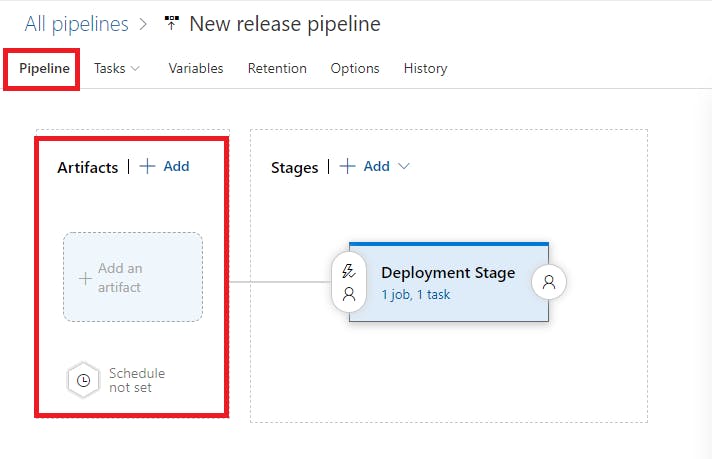
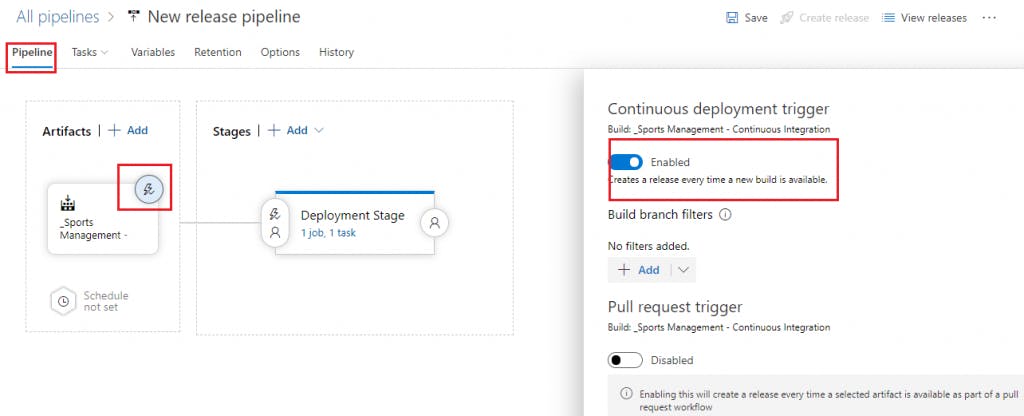
Add an artifact as below and schedule a trigger.
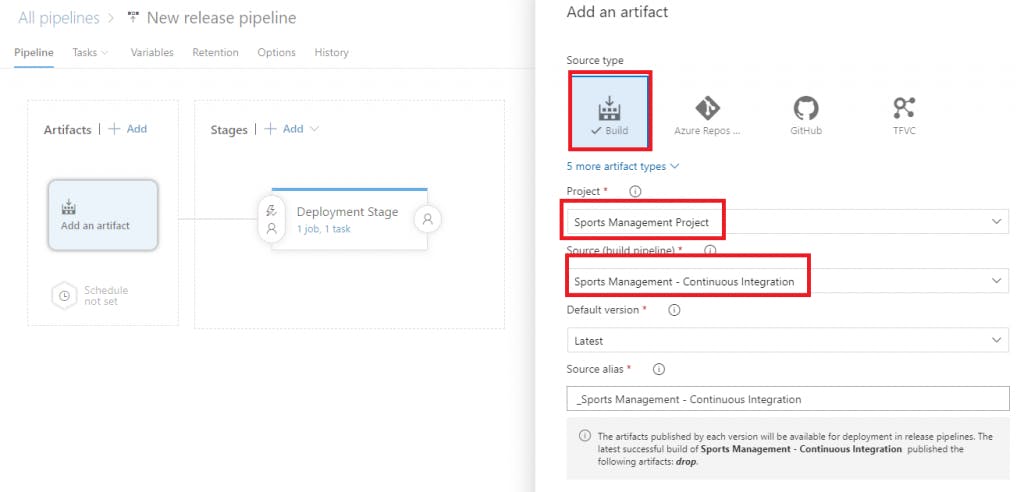
Source(build pipeline) -> The CI pipeline (‘Sports Management – Continuous Integration’)
Project -> Target project (‘Sports Management Project’ in this context)
Enable the Continuous Deployment Trigger, so that it gets activated after every build.
Save the configuration as shown below.
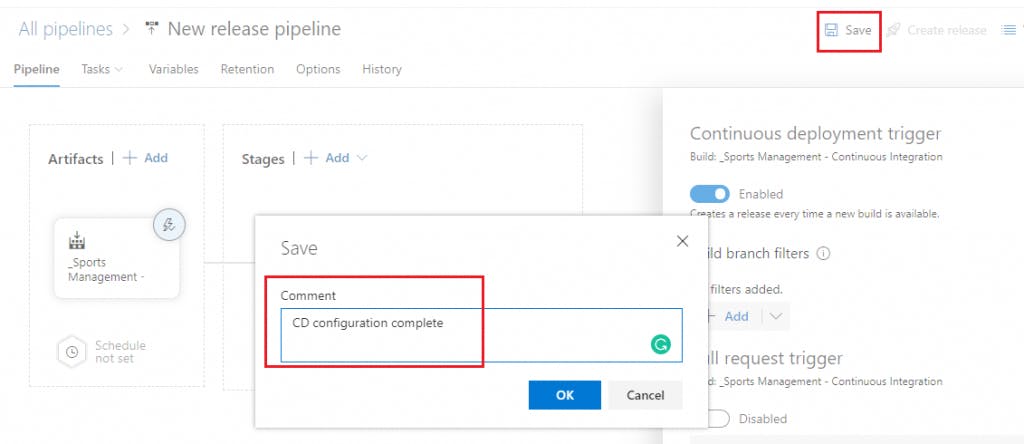
The CI/CD configurations are complete, we have set the build & deploy to start once there’s a commit/merge to master branch.
Test CI/CD
Let’s merge a PR to master and see whether the CI/CD pipeline runs automatically or not.
I’ve created a PR to merge code from develop to master, as below. Completion of this PR should start the CI/CD pipeline.
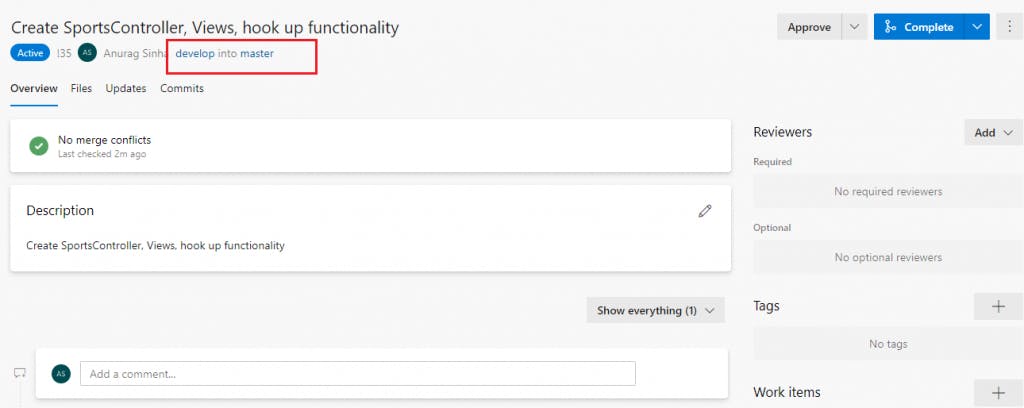
Below embedded video shows that the above PR merge triggered the automated CI/CD pipeline and deployed to Azure App service.
CI/CD Demo
Let’s have a look at the app service’s url at https://sportsmanagement.azurewebsites.net/
Looks like our application has been deployed.
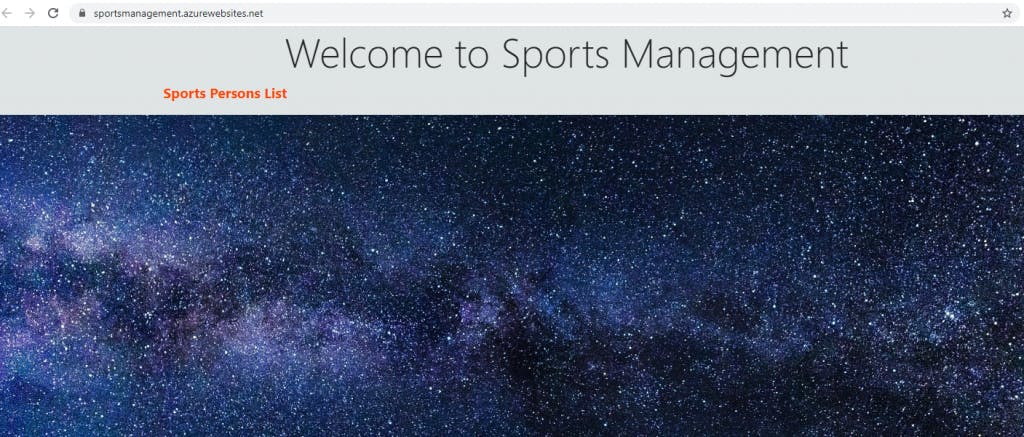
Click on the ‘Sports Persons List’ link to verify the functionality, a 500 – Internal Server Error is thrown in the console.
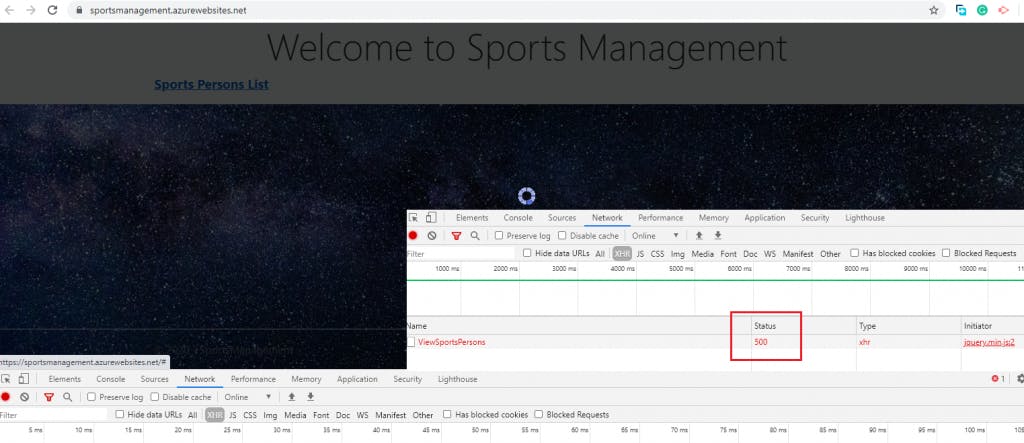
We’ll try to investigate step by step as to what went wrong.
- Azure App Service – configured correctly
- Azure SQL DB – configured correctly, scripts executed
- App service allowed to access Azure SQL DB – yes, in server’s firewall settings
- CI/CD pipeline – configured correctly
- Azure App Service’s connection string – has it been configured correctly? Does it know which database to target? Let’s check.
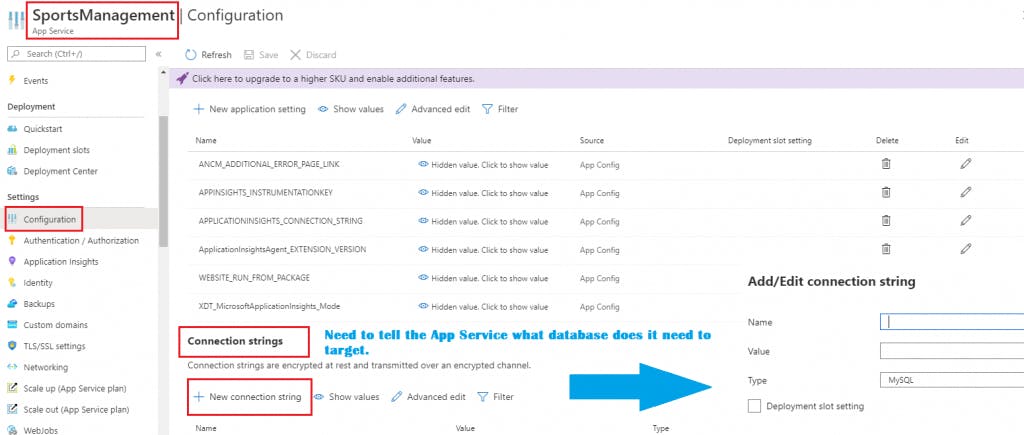
We have not configured the app service’s connection string, the deployed code doesn’t know which DB to connect to and hence the 500 error. Add the connection string as shown below.
Name – DefaultConnection (same name as configured in the code base)
Value – connection string of the Azure SQL DB

Click on Save, the app service will restart to reflect the changes.
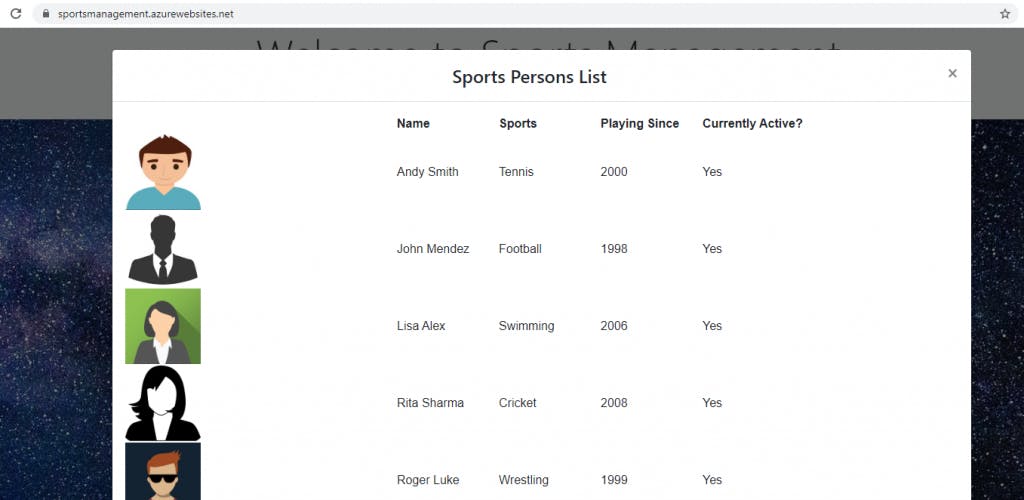
We see that we are able to get data from the Azure DB, once the above issue is sorted out.
Conclusion
In the above post, we have created and configured:
- Azure App Service
- Azure SQL DB
- CI/CD pipeline in Azure DevOps
The above summarization can be illustrated as below:


